Where do I start. This was a fun project. Challenging at times because of my unwillingness to follow what others have done. All in all it looks very nice hanging in my living room. If i had it all to do again or if anyone wants to follow what I have done, Don't use foam board as a base, use a light wood instead. I wanted to use LED rope lights so that heat and FIRE were not a problem. with the high cost of LED rope lights i was forced to use incandescents. In the future when LED rope light prices drop, or I find a different light source I will replace the incandescent lights in my foam board box. In the future I will build another and use wood instead of foam board.
Other problems I ran into like mounting the box on the wall make this more of a pain than using wood. Also the sheer thinness of the foam board also caused some difficulties when creating some portions of the box. There were other difficulties like screws that made using foam board not worth the effort.
bottom line, Use Wood!
There were about 4 or so sites that I took information from to create my Light box, But if you want to build one of these masterpieces, My recommendation would be to follow this guys instructions and do as he did.
http://www.weilandworks.com/summerland/lightbox_overview.html
this is probably the best source I found in all my searching. His descriptions are excellent and his work is beautiful. Even though he built his boxes back in 2001 he is still updating his site so he is still active if you have questions.
As always anytime I can get the time and supplies to build props and costumes is always great fun and time well spent. Enjoy my creation, I know I will.
Happy building!
Stripe
Tuesday, May 4, 2010
Poster Light Box - Completion
It's complete...well for now. I have it displayed in my living room all nice and shinny. Here are some final pictures.

All lights out with box on

Lights on with box on

lights on with box off
Monday, May 3, 2010
Poster Light Box - Finishing it up
today I finished up the project, with exception of trim I plan on putting around the back edge of the box. I started by removing the screws from my frame and placing the Plexiglas back in. screwing the plexi back down making sure to sink the heads of the screws until they are flush, remember not to do this with the actual screw, but use a drill bit or a file, I used a cone grinding tip on my Dremel to make quick work of it. Here is a shot of my screws flush with the top of the plexi, it's a little blurry.

Here is a shot of the bottom piece of plexi after it's been installed back in the box, as you can see the UV acrylic frosted the plexi.
 Time to insert the poster before placing the frame on top of it. I used 3 pieces of scotch tape roughly 2" in length to hang the poster from the top of the frame. the rest of the poster will float in the frame in between the 2 pieces of plexi.

Now the frame goes on and the screws were inserted in the top and bottom of the side rails to keep the frame on the box. Just one in the top and one in the bottom of each side rail. I don't want to have to unscrew the world to change out the poster. It's just enough to hold the frame on. Then a touch of gold paint to help the screw blend in.

Next I needed to figure out how to hang the box. I picked up some Utensil Hooks from 3M with the command strips.
 I bent the hook down enough to make a loop.
 I attached the hooks to the box about 12" down from the top.

 Then I attached Hanging wire between the 2 hooks.
 Everything looked good UNTIL...as soon as I lifted the box by the wire to test the hooks one popped right off. Back to the drawing board. I broke the 5 minute epoxy back out and glued the hooks down. While the glue was drying I compressed the Hooks flat together trapping the hanging wire between so that the box will lye closer to the wall. pic is a little fuzzy.


Here is a shot of the bottom piece of plexi after it's been installed back in the box, as you can see the UV acrylic frosted the plexi.


Now the frame goes on and the screws were inserted in the top and bottom of the side rails to keep the frame on the box. Just one in the top and one in the bottom of each side rail. I don't want to have to unscrew the world to change out the poster. It's just enough to hold the frame on. Then a touch of gold paint to help the screw blend in.

Next I needed to figure out how to hang the box. I picked up some Utensil Hooks from 3M with the command strips.


Thats all for now, final pictures and thoughts to come once I get the box hung on the wall.
Sunday, May 2, 2010
Poster Light Box - Plexiglas and the Frame
The Next thing I did was to Cut the Plexiglas. I cut one piece to fit inside the top of the box. Before I cut the second piece I sprayed the first piece of Plexiglas with Krylon UV Protective Acrylic (Matte) on the side that is to be inside the box.. This accomplished 2 things. It gives my poster the UV protection that it needs to keep from turning yellow and becoming brittle. It also gave the glass a frosted look as to diffuse the light, making the light more even across and poster box and hiding the lines of lights. The second piece of Plexiglas is to cover the entirety of the box. I took no pictures of all of this, Lots of scoring of the Plexiglas with the cutter. and some bending to snap it into.
The next thing I did was to lay the outer piece of Plexiglas on to of the box. Using 1/4 X 1/2 aluminum angle iron, I framed the box. I didn't worry about mitering the box, It will be covered later.
 Once I had the aluminum taped to the Plexiglas I flipped over the entire box over so I didn't dislodge the frame keeping it square and getting it upside down on the table.
 Now that I have it flipped over and removed the box I can continue to work on attaching the frame to make it one solid piece. To do this I picked up some 2 1/2" blocks from Lowes
 I decided that I wanted the blocksto stick out about 3/4" above the trim and marked them off.
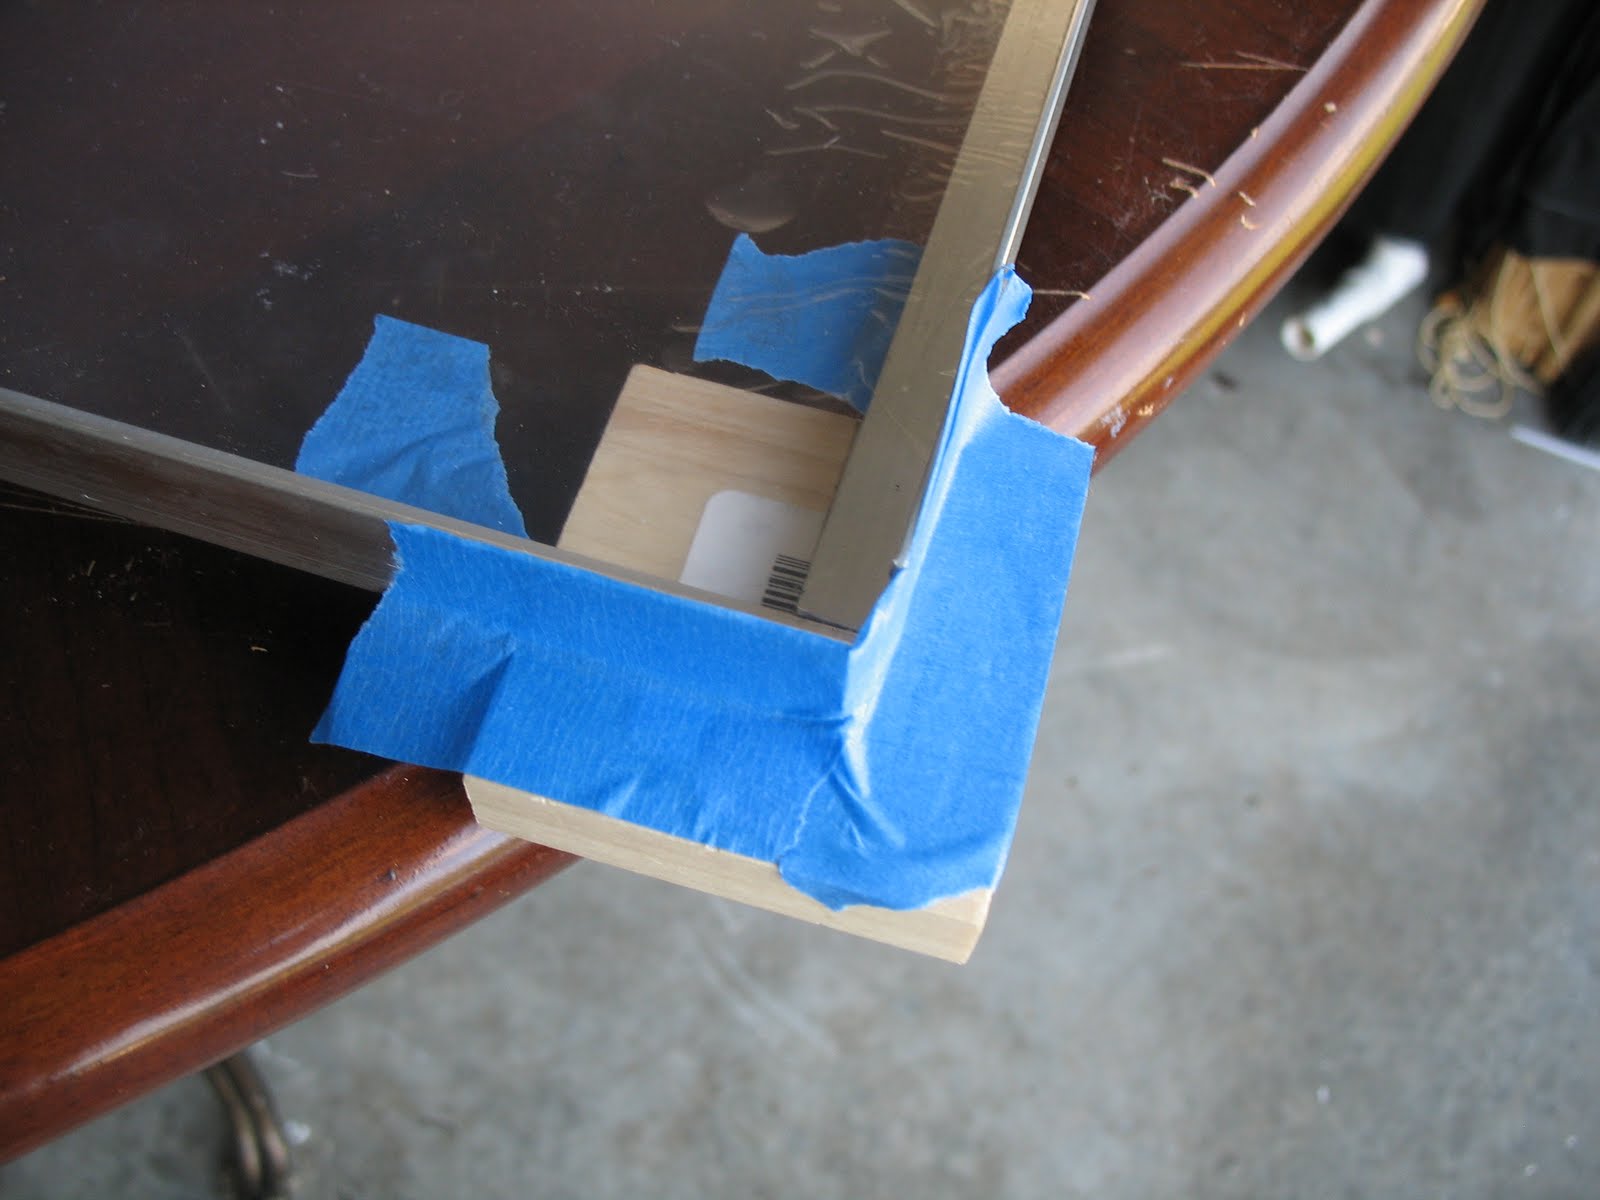
 Once I had the blocks marked off and aligned with the frame on each corner, I taped each block to the frame so that it wouldn't move

drilled 2 holes through the Plexiglas, the aluminum frame, and partially through the corner block for each rail.
 Next I removed the Plexiglas, and screwed the aluminum to the corner blocks. which allowed me to handle the frame with out loosing the square alignment. also removed the tape at this time as it's no longer needed. flipping the frame over I measured out and cut my 3/4" trim to fit between the corner blocks and cover the aluminum frame.
 I then attached the trim to the frame using 5 minute epoxy. I would have just used the Gorilla Glue, but it expands too much and there is no real good way to clamp down the trim I picked out.

 Once the trim was dry I placed the frame back on the box and drilled one hole on the top and bottom of the side rails and through the wood blocks inside to attach the frame to the box.
 Next I painted the frame gold using Krylon metallic gold. here is what it looks like all nice and shinny.

The last thing I accomplished this weekend is to place the inner Plexiglas in the box. and screw it down. making sure the wood screws were as flush I could get them with the Plexiglas.
The next thing I did was to lay the outer piece of Plexiglas on to of the box. Using 1/4 X 1/2 aluminum angle iron, I framed the box. I didn't worry about mitering the box, It will be covered later.


drilled 2 holes through the Plexiglas, the aluminum frame, and partially through the corner block for each rail.


The last thing I accomplished this weekend is to place the inner Plexiglas in the box. and screw it down. making sure the wood screws were as flush I could get them with the Plexiglas.
Poster Light Box - The Innerds
I needed a way to attach the Plexiglas and the frame to the foam board, So I cut 4 blocks oit of a strip of wood I had lying around. glued them in to each corner.


The next thing I needed to solve was how to attach the rope lights and how to keep it from melting the foam in the back wall. I found some yardsticks at Wal-Mart for $0.50 each. I glued them down at even intervals and screwed down the clips that came with the rope lights at about a 7" interval along each yard stick.

 Next in order to reflect all the light out of the glass side of the box, I used double sided tape to attach aluminum foil shiny side up.
 The next thing was to install the light rope.

 Once the lights were in I had to cut a large hole in the bottom of the box in order to get the power cord in. In order to close this hole up, I taped electrical tape around the powercord on the outside of the box untill it almost completely covered the hole.

 I wanted to use LED rope lights, But due to the severely overpriced LED lights at the only place in town that I found them, I was forced to go with the regular incandescent rope lights. This produced a new problem that I had to solve which I did when I was trying to decide how to attach the rope lights in the box, HEAT! In order to deal with this new factor I cut in some vent holes in the top of the box, and placed a piece of foam board over the holes on the outside using some very small nuts as spacers.

 as you can see here I wasn't too worried about it being straight as It's on top of the box and will be very difficult to see once it's hanging on the wall. and you can see the paint still drying in the photo.


The next thing I needed to solve was how to attach the rope lights and how to keep it from melting the foam in the back wall. I found some yardsticks at Wal-Mart for $0.50 each. I glued them down at even intervals and screwed down the clips that came with the rope lights at about a 7" interval along each yard stick.


Subscribe to:
Comments (Atom)
