Tuesday, July 9, 2013
Thursday, April 18, 2013
R2-D2: Dome!!!!
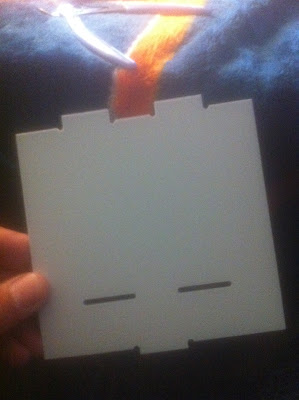
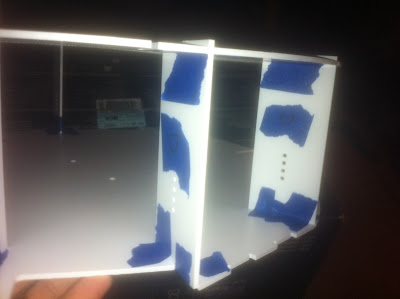
Right after arriving home today my laser cut polystyrene dome set arrived. Some of the panels had already been shaken out by UPS and a small piece had been broken off the bottom of one of the panel pieces at the bottom of the dome. I'm so angry at UPS. Is there anything that arrives from them that doesn't look like it was used as a socker ball? I am super-excited to get back to work on R2. On top of getting back to work my lovely bride, Scarlet, is going to build R2 with me! Makes me very happy to share this project with my lovely bride!
Friday, March 15, 2013
R2-D2: EPIC FIND! and Other Goodies
Today I found the ever illusive and discontinued Valspar Premium Enamel Brilliant Metal Silver spray paint. I do believe that Valspar has brought it back. As Lowe's received a case about a week ago and is due to receive another case in a few weeks.
I also came by some cool goodies while I was out. a few PEZ dispensers and a bag of Darth Vader heads filled with candy.
I also came by some cool goodies while I was out. a few PEZ dispensers and a bag of Darth Vader heads filled with candy.
Wednesday, March 13, 2013
R2-D2: Happy Day!
Happy Day! My 2 pints of Weld-On #3 and tube of Weld-on #16 arrived today! I can finally start welding my frame together and get this build on the road.
Saturday, March 9, 2013
R2-D2: More goodies in the mail
I received my box of goodies from Gaunt Industries today. I was expecting Hypo 25ga needle bottles instead I received 20ga bottles. I will have to see how these work when my Weld-On arrives. With just air the flow seems a bit constricted. But it could be perfect. I'll test it out and see if I should complain to Gaunt or not. On a good note my suringes and funnel were in the shipment and exactly what I ordered.
Wednesday, March 6, 2013
R2-D2: Rockler Bearing Arrival
I received My lazy suzan Rockler bearing today. Once I got it unpacked and unwrapped the first thing I did was give it a spin to find that it's extremely stiff. So to start with a good cleaning is in store for it. I will be taking it apart and cleaning the gunk out deburring it anywhere in the tracks that there is unwanted material and polishing the track with my trusty Dremel. I haven't decided on what type of lubricant I'm going to replace the gunk with yet. Nor have I decided to replace the steel bearings with Acetal bearings yet. I will have to see how loud it is once I get it cleaned and put back together.
Friday, March 1, 2013
R2-D2: The Excitement Of getting back to work and new stuff.
After 2 back surgeries I'm back at it again. WOO HOO! I ordered the wonderful Styrene A&D dome back in early Feb and can't wait for it to arrive in April some time. This began the extreme research I have been doing on a daily basis. So as I await the dome arrival I started gathering other things I needed.
Today I picked up a 2 ft steel ruler and some squeeze bottles from Hobby lobby. I'm not sure how they are going to work out because the metal tips are really short. they may work for a few areas but I'm concerned that it's not going to be long enough for most everything, but for $3 it can't hurt..
I stopped by Lowe's today looking for the illusive Valspar Premium Enamel Brilliant Metal Silver. They were showing one on hand but couldn't locate the can. I had the guy look it up and he said that they have a case due in on the 5th. I was shocked as I thought it was discontinued and have herd nothing new on it. So I will be going out on the 5th to pick a few up. I picked up a few Irwin Quick grip mini and micro Quick grip clamps. I still need to pick up a few of the larger ones. but they were out of stock on the ones that I wanted.
I stopped at Harbor Freight and picked up a few combination squares and a dual cartridge respirator. I have sucked up enough fumes working on fighter aircraft for 18+ years I don't need any more fumes.
Once I was home this evening I placed an order for 2 pints of Weld-On #3 and a tube of Weld-On #16. I'm hopping that the 2 pints will cover more than my R2 project as I have other projects in the waiting stages I will get to after R2 is complete. I ordered my Rockler bearing and will be happy to get it cleaned up and ready to use. I also broke down and ordered some of the Hypo 25 gauge bottles and syringes feeling like the previous will not suffice. I didn't want to get the Weld-On and not be able to use it because of their short tip.
More to come when all my goodies come in the mail.
R2-D2: A long overdue update...The Skirt
It's been a while since I have updated.
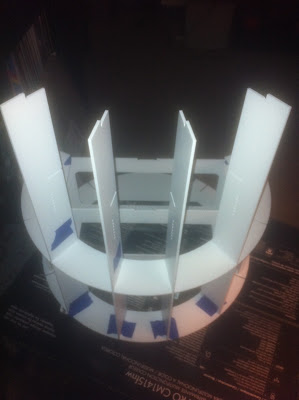
After I finished the update on the frame I continued work on the skirt.But never updated the blog. The following are a few shots of the frame ans skirt dry fit together. It's a shame I have to take it all apart to glue it together.
After I finished the update on the frame I continued work on the skirt.But never updated the blog. The following are a few shots of the frame ans skirt dry fit together. It's a shame I have to take it all apart to glue it together.
The slats placed in the provided slots. is a perfect snug fit.
the top ring, err bottom which ever way you look at it, attached.
A side shot of the completed skirt frame.
The skirt attached to the frame.
A shot of the complete structure.
Ahh...Painters tape is a wonderful thing. a shot looking down the body.
Frank's frame is a masterpiece. It's very strong and sturdy. I have been listening to my kids whine about R2 attacking them as they walk by. They have come away with some good scrapes and a few cuts. They have ran in to it a few times really good. Even through all of that with just the painters tape holding it together it hasn't given an inch. It's extremely sturdy. I'm very satisfied with this frame. Thanks a tone Frank. This thing is AWESOME!
Sunday, July 29, 2012
R2-D2: Frame Test Fit
Yesterday I dove in to my build. I did an almost complete test fit. The only thing I didn't fit was the skins and ribs on the skirt. Everything else is together. Below I'll give a step by step as I worked out how to put the frame and skirt together. I'll also point out a few things that took some trial and error to figure out.
Getting Started
punching out parts from the sprue and cleaning off the tabs and flash that was left over on the parts. I used a had full of tools that made my work easier and quicker than it would have been otherwise.
The most obvious is blue painters tape. this stuff is great at holding without being super sticky and keeps you from having to do major clean up before painting your parts. I have enough tape on the frame right now that It's distracting when you look at the photos, but necessary to hold everything together with my cats roaming around the house trying to use my frame as a kitty castle. I'll see If I can't catch one of them in it and plug in a picture later.
the other two tools I used are a pair of Testors sprue cutters, Perfect for removing the tabs and stray fibers from the parts without cutting in to the part, or having to sand down the leftovers. Nice smooth cuts. The last tool is a set of Testors needle files. great for smoothing out any rough spots and removing any leftovers and fibers in the grooves and holes of the parts. especially out of the holes. Both of these can be picked up at any store where they have a decent selection of model supplies. I found mine at Hobby Lobby.
Below are a few shots of how well the flash and tabs are cleaned off with these tools, and minimal work. this could have took hours with a hobby knife. I cut huge amounts of time and cleaned up all the parts without any of the gouges that can happen when using a hobby knife.
As I started punching out and cleaning up parts I pulled parts in sets. One I got the parts for the shoulder hubs cleaned up I started putting them together. Defeating my purpose of getting all parts punched out and cleaned up before I started building.
Here are the Shoulder hub parts cleaned up.
Attaching the two sides and the 4 cross supports. Everything in is tabbed and grooved so it fits together nice and snug. The tape is required to hold it together until I get it glued up.
as this is a dry fitting there will be a lot of tape to come.
The frame before the hub plates are attached.
A few shots of the completed shoulder hub.
Back to cutting off tab and flash from parts. Frank marked the sprue of each ring with the ring number and marked the top and front of ring 1 as it has a top/bottom front/back orientation it's important to keep the orientation of ring 1 correct. I thought it important to mark each frame ring with it's perspective number before removing them from the sprue to keep me from being confused and wasting time trying to figure out what ring is 2 and which is ring 4. I used a piece of tape and marked each with a sharpie.
Frame parts all cleaned up and ready for fitting together.
As I started looking at the ribs and trying to figure out which was which and where each rib was to go on the rings, I found I was confused for a bit. It took some time to figure but I finally figured it out. As there are 16 ribs, and 7 different styles. Using the lettering system that Frank used. I labeled each rib. Starting from the right side of my picture they are labeled; A, A-Left, C, C-Left, D, E, and G.
Note: that ribs A-Left and C-Left have one extra cut in them.
Assembly
Now that everything is punched out and cleaned up It's time to start getting this test fit on the move. Following Franks instructions from his website r2d2.media-conversions.net I began to fit parts together.
Insert the tabs on the top of the Shoulder hubs into ring 4. This should be the single tab side. I found that I had to use one of my files to file down the slots just a little in order to fit the tabs in the slots. filing just a little at a time.
Once ring 4 is on I taped it to the shoulder hub assembly and installed the larger portion of ring 3. again I had to use one of my files to widen the gap a touch so that the tab would fit in the slot. Once on I taped it down.
Setting this piece aside and picking up ring 1 I began to work the rest of the frame.
Picking up ring one I verified top/bottom and front and rear orientation. This is very important as the ring isn't a perfect circle.
I snagged this photo from Franks website and edited it as I forgot to take a photo of the ring before adding parts to it.
Here is where I ran in to some issues. Trying to figure out exactly where each of the ribs belong. franks instruction isn't clear here for attaching ring 1 and 2 using the 4 "Rib's D" (stubby ribs) As I placed them in the wrong positions at first but when I went to install ring 2 on top I couldn't get the slots to line up when the orientation pits on rings 1 and 2 were aligned. After some trial and error It finally hit me that it's basically the corner positions creating an X adding stability to the ring. the arrows on the diagram below designate the locations of the 4 "Ribs D"
Also watch your up and down orientation on these ribs as well as I didn't discover until I was trying to attach the upper portion of the frame to this section that the tabs on one end are longer than the other. furthermore the longer slots through both ring 1 and 0.
In the photo below you can see that I have the ribs upside down as the longer tab is sticking out of ring 2 not ring 1.
Next Add Ribs A, A-Left, C, C-Left to the front of ring 1 & 2. After a moment of thought, I started by inserting A and A-Left in the center to slots of the rings. Then added Ribs C and C-Left on the outsides. Left and right should be self explanatory... Left and Right.
Add in the rest of the ribs E and G. Shorter (Rib E) on the sides and longer (Rib G) in the back.
Install 2 structures together make sure to align up the slots as you insert the 2 pieces. then add the 2 ring sections together.
I really went the hard way about doing this as I installed Ribs G into the rings on to Shoulder rings then attempted to connect the 2 structures together. It took me a bit to get the 2 together. then I added Ribs E. afterwards. This is when I discovered that 3 out of 4 of the D Rib's were installed upside down. I basically had to pull half the ribs out to get this all corrected. I still wasn't sure why so much of the ribs stood out on the bottom side, and was thinking I was not going to like having to sand down those tabs. This is exactly why it's always a good idea to do a dry fit before gluing things together. Here are some more photos.
Frame with the 2 large structures joined together. But with the issues I have already pointed out.
Notice the picture on the right that there are no tabs sticking up about the short (D) ribs.
Another photo, from the side, showing my D Ribs upside down.
finally the ribs orientation are correct and the frame is back together.
Now comes the rest of the 3rd ring.
Slips right in.
Slips right in.
this is the only part of Ring 3 I'm not sure where it goes yet so I just taped it to ring 1 so I wouldn't lose it. I'll figure it out later.
Adding the Ankle Plate.
Easy tabbed fitting. Insert the slice in to the slot on the plate.
Insert the plate into the groove of ring 2 and the 2 grooves of ring 1.
Test Fit of Frame Complete.
Well Almost
Well Almost
TO BE CONTINUED...
Subscribe to:
Comments (Atom)


